
Read Next
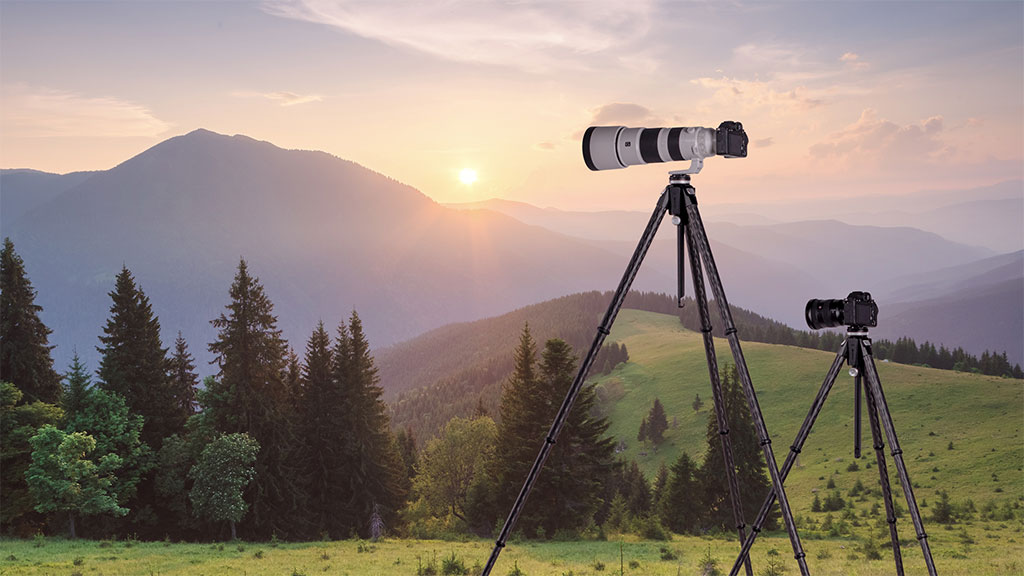
How An Auto-Leveling Tripod Makes Life Easier For Photographers
Getting your tripod level can be...
Fujifilm X-H2S Review
Read our review of the X-H2S to find...
5 Reasons To Buy A High-Quality And Adjustable Tripod
Shopping for a tripod can be confusing....
Do More With Your Polarizer
If you think a polarizer is only for darkening the sky, you’re missing opportunities to enhance reflections, saturate color and emphasize texture in shade or overcast. Many nature photographers are simply screwing on a polarizer without understanding how it works, mistakenly believing that merely having it attached is sufficient. When used properly, a polarizer is one of the most valuable tools in your bag for creating rich, evocative landscape photos.
When used improperly, it can mess up your image in a way that no amount of postprocessing can fix. The amount of polarization any composition calls for is a creative decision that can make or break an image. And, unfortunately, a misoriented polarizer is worse than no polarizer. With no Photoshop substitute to help you recover, your only option is to get the polarization right at capture. I’ll show you how to make the most of a polarizer and provide pro secrets on how to use it in situations you may not have considered.
Why Use A Polarizer?
A polarizer can transform a lackluster scene into a photograph with depth, richness, saturation and contrast. With reflections minimized by a polarizer, pale blue sky is transformed to a deep blue, the natural color and texture of rocks and foliage pop, and clouds that were barely visible suddenly snap into prominence. Or imagine mountains reflected in a still alpine lake—as you rotate your polarizer, the reflection is replaced by rocks and leaves dotting the lake bed; keep turning, and the reflection returns.
How To Think Beyond The Blue Sky
1 Look down! As nice as the effect on the sky is, it’s the polarizer’s subtler ability to reduce glare in overcast or shade that I find irreplaceable. Lock your eyes on a reflective surface and rotate the polarizer. The effect is most obvious on water, or wet rocks and leaves, but even when completely dry, most rocks and leaves have a discernible sheen. As you rotate the polarizer, harsh glare is replaced by natural color and texture; continue rotating, and the glare reappears. The glare is minimized when the scene is darkest.
2 Experiment with the middle of the range. Regardless of the effect, there’s no rule that requires you to turn the polarizer to one extreme or another (maximum or minimum reflection). Rotate the outer element slowly and look carefully through the viewfinder as the scene changes. Stop when you achieve the desired effect. This is particularly useful when shooting reflections. In the North Lake autumn reflection scene, I was able to find a midpoint in the polarization that kept the best part of the reflection on the mountains and trees, while still revealing the submerged granite rocks at my feet.
3 Chase rainbows. Dialed to just the right point, a polarizer can make a rainbow stand out more by darkening background clouds. On the other hand, dialing a polarizer to cut reflections will make the rainbow disappear.
In this example, the rain was dumping as I waited for the image above, but I had just driven through clearing skies to the west, and I knew it wouldn’t be long before the clearing reached Yosemite Valley. When the rainbow appeared, I dialed my Singh-Ray polarizer while peering through my viewfinder; maximum polarization erased the rainbow completely, but I found a partial setting that revealed the rainbow while darkening the sky.
4 The polarizer as impromptu neutral-density filter. A polarizer also can be used as a two-stop neutral-density filter by dialing it to maximum polarization (minimum light). In the image of a redbud above the surging Merced River, even at ISO 100 and ƒ/32, I couldn’t reach the 3⁄4 sec. shutter speed that would give me the motion blur I wanted. But the two stops of light I lost to my polarizer were just enough to get me where I wanted to be.
5 Is this a good scene for a polarizer? When you approach a scene, ask yourself, does this scene call for a polarizer? Get used to trying your polarizer for everything you possibly can. To determine the polarizer’s effect, rotate the outer element 360 degrees as you peer through your viewfinder or while viewing the LCD in live-view. Often, just holding the polarizer to your eye and rotating it slowly is enough to determine its benefit. Either way, if you can’t see a change, you probably don’t need to worry about a polarizer.
Because a polarizer also can enhance reflections and glare, whenever the polarizer is on, I strongly urge you to test its effect with every composition and especially after switching from horizontal to vertical orientation. Unless I’m trying to maximize a reflection, I rotate the polarizer until the scene appears darkest. If there’s no apparent change, I watch specific objects that might have a slight sheen like water, a leaf or a wet rock as I rotate the polarizer. I almost always find some change.
Three Polarizer Pitfalls To Avoid
> Lost light. A polarizer costs you one to two stops of exposure, depending on the polarizer and the amount of polarization you dial in. Since aperture manages depth, landscape photographers usually compensate for the lost light with a longer shutter speed—one more reason to use a tripod.
> Differential polarization. Because a polarizer’s effect varies with the direction of the light and wide lenses cover such a broad field of view, light strikes different parts of a wide scene from different angles. The result is differential polarization: parts of the scene that are more polarized than others.
Differential polarization is particularly troublesome in the sky, appearing as an unnatural transition from light to dark blue across a single frame. This effect often can be reduced, but rarely eliminated, with careful dodging and burning in Photoshop. Better yet, avoid images with lots of boring blue sky.
What, Exactly, Does A Polarizer Do?
It helps some people to understand that a wave of light oscillates perpendicular to its direction of motion—picture the way a wave in the middle of the ocean rises and falls as it advances. The wave moves forward, but the water moves up and down. In simple terms, by removing light that oscillates in a specific direction, a polarizing filter removes reflection. Polarization (reflection reduction) is most pronounced when your lens points 90 degrees (perpendicular) to the direction of the sun (or other light source); it’s least effective when the lens points directly toward or away from the sun.
A circular polarizer, which is what you want for today’s DSLRs, screws to the front of your lens. Rotating the polarizer’s outer element relative to its fixed, inner element varies the orientation and amount of polarization. You can see its effect through your viewfinder or on your live-view LCD.
Gary Hart’s Recipe For Using A Polarizer
> Always on (unless it’s night)
> No other filters except a graduated neutral-density filter, when needed
> Compose my shot and lock it in place on my tripod
> Turn the polarizer to get the
effect I want
> Expose the scene
> Check for lens flare, and shield,
if necessary
> Click
> JUST DO IT!
> Vignetting. Another problem a polarizer can introduce is vignetting. With two pieces of sandwiched glass in a frame, allowing the top glass to rotate relative to the bottom glass, a standard polarizer is fairly thick. The field of view of ultrawide lenses can be so large that, at their widest focal length, they risk including the polarizer’s frame. Polarizer vignetting manifests as dark edges on your images, particularly at the corners.
Most of the best polarizer manufacturers offer a low-profile version that minimizes vignetting. Low-profile polarizers typically cost more, they sometimes require a special lens cap, which can be a minor annoyance, and they don’t have external threads to accommodate another filter.
How I Use My Polarizer
> It’s almost always on. Since I’m all about simplicity in the field, and determining whether I need a polarizer and then installing or removing it as needed is more trouble than it’s worth, each lens has its own polarizer that never comes off during daylight hours. I remove my polarizer only when I need more light; but remember, I’m always on a tripod, so unless it’s night or I’m dealing with wind or water motion, the light lost to the polarizer isn’t a concern (Image 6).
But shooting with no polarizer is better than using an incorrectly oriented polarizer. If you’re going to follow my “always on” polarizer approach, you must be diligent about rotating the polarizer and checking its effect on each composition or risk doing more harm than good to your image.
> Protection. Like many photographers, I always use a filter as protection for my front lens element; unlike many photographers, I don’t use UV or skylight filters. While it’s possible to stack a polarizer with a UV or skylight filter, I don’t. Instead, because it almost never comes off, my polarizer doubles as protection for the front lens element.
If you have a lot of different-sized lenses, buying a polarizer for each can get expensive in a hurry. Not all scenes benefit equally from a polarizer, and photographers on a budget can’t always afford one for every lens. A viable solution is to buy one for your largest-diameter lens and use step-up/step-down adapters for your other lenses. As long as you’re shooting on a tripod, another solution is simply to hold the large polarizer in front of the smaller lens as you shoot. Just take care not to have your hand in the shot!
Singh-Ray Gold-N-Blue Polarizer
www.schneideroptics.com
Heliopan (HP Marketing Corp.)
www.hpmarketingcorp.com
HOYA (THK Photo)
www.thkphoto.com
Kenko (THK Photo)
www.thkphoto.com
Pro Optic (Adorama)
www.adorama.com
Singh-Ray
www.singh-ray.com
Sunpak (ToCAD)
www.tocad.com
Tiffen
www.tiffen.com
Given that my polarizers are in the $200 range, this gets a little expensive when a filter “takes one for the team,” but it’s cheaper than replacing an entire lens and more desirable than stacking superfluous glass between my subject and my sensor, not to mention the vignetting caused by stacking. On the other hand, I’ll use a graduated neutral-density filter with a polarizer because graduated neutral-density filters perform a specific (not superfluous) function.
> The polarizer and lens hoods. To anyone who knows what a pain it is to rotate a polarizer with a lens hood in the way, I have a simple solution: Remove the lens hood. I never use a lens hood. Ever. This is blasphemy to many nature shooters, but personally I hate lens hoods, which always seem to be in the way. Like I said, I strive for simplicity in the field. But beware! Jettisoning the lens hood must come with the understanding that lens flare is real and sometimes impossible to correct after the fact.
When there’s a chance direct sunlight will strike my front lens element, I check to see if shielding the lens helps. With my composition ready and the DSLR on my tripod, I peer through my viewfinder and shield my lens with my hand or hat or whatever is handy. If the scene becomes darker and more contrasty or random fragments of light appear and disappear when my lens is shaded, I know I have lens flare and need to manually shield my lens while exposing. Of course, if the sun is part of the composition, no shading in the world will eliminate lens flare.
All Polarizers Are Not Created Equal
Use only quality polarizers; you don’t need to spend a fortune, but neither should you skimp. Not only does the quality of the optics affect the quality of your results, but I’ve also seen many poorly made polarizers simply fall apart for no apparent reason.
I advise buying polarizers that are commensurate with your glass—if you have top-of-the-line lenses, it makes no sense to use anything but top-of-the-line polarizers. I use Singh-Ray, but other quality brands include B+W, Heliopan, HOYA, Kenko, Pro Optic, Sunpak and Tiffen.
Like anything else in photography, using a polarizer is an acquired skill that improves with use. You don’t need to immediately jump in with both feet, but I suspect once you tune in to the polarizer’s benefits, you’ll have a hard time photographing nature without one.