
Read Next
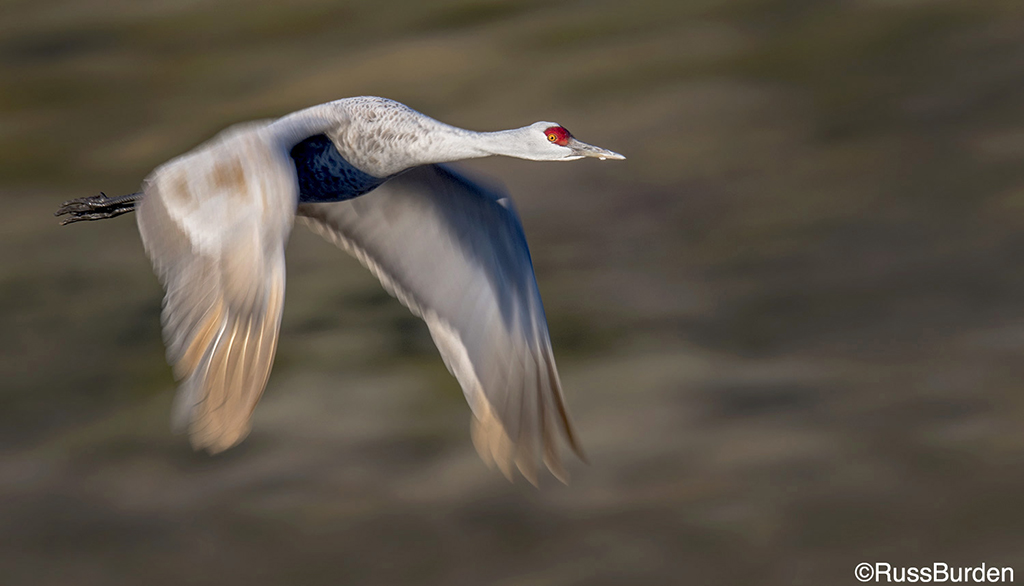
10 Action In Nature Quick Tips
As you know, nature photography isn’t...
Critically Sharp Captures
To obtain excellent-quality, tack-sharp...
Get Drenched In A Downpour Of Pixels
Get Drenched In A Downpour Of Pixels
Over 70 percent of the Earth’s...
Master The Grad ND
Orienting a Singh-Ray 2-stop hard GND filter diagonally across the granite/sky intersection allowed me to bring out foreground detail while maintaining color in the Yosemite sunrise sky. Photo by Gary Hart.
A typical graduated neutral-density filter (GND) scene is a landscape with a bright sky and dark foreground. While this extreme dynamic range is often addressable with blending and processing techniques, a GND can subdue dynamic range enough to give you more processing flexibility. A GND is also useful in scenes with motion that make blending difficult.
Choosing the Right Filter for the Scene
Effective GND use requires the correct filter for the scene. Hard? Soft? Reverse? How many stops of density? Your goal is always to defeat the scene’s dynamic range with minimal evidence that a filter was used. Placing the transition separating the filter’s dark and clear regions in the wrong place, or using too much or not enough density, will be ineffective and/or betray the filter’s use.
A GND filter darkens half of the scene without affecting its color. The strength of a GND is the amount of density in its darkest region, measured in stops. For example, a 2-stop GND will subtract up to 2 stops of light.
A hard GND filter has an abrupt transition. Its effect is much more pronounced than a soft GND filter (which has a more gradual transition) because a greater percentage of a hard GND is maximum density. The downside of a hard GND filter is that its abrupt transition is much harder to disguise in the scene.
A reverse GND filter’s region of maximum density is across the middle, with an abrupt (hard) transition to the clear region below and a more gradual transition to less dark (but not clear) to the top. A reverse GND is most effective at sunrise or sunset, when the brightest sky is on the horizon.
A soft GND filter’s effect is more subtle than a hard or reverse GND. Its darkest region is at the top, and it gradually transitions until it’s clear from the middle down. A soft GND is better for scenes where a hard transition is difficult to disguise or scenes with less extreme dynamic range.
I used a Singh-Ray 3-stop reverse GND filter, which allowed me to target my filter density on this Ke’e Beach horizon in Hawaii, where it was needed most. Photo by Gary Hart
Disguising Your GND Filter Use
Disguising the transition between the dark top and clear bottom of the filter is job one for GND use. Choosing the right filter for the scene, and recognizing the best place to hide the transition, is an art that improves with experience.
Hard and reverse GND transitions are easiest to disguise in scenes with a straight, uniform horizon, such as the ocean or a flat desert. Lacking that, look for a darker, low-detail region spanning the frame between a bright sky and shaded foreground, like a line of trees at the base of a mountain.
When shooting toward the sun, I prefer a hard or reverse GND with as much density as I can get away with, because the more density I can apply to the sky, the brighter I can make my foreground. Sometimes the terrain doesn’t provide a good place to hide a hard or reverse GND transition, but that’s my goal until I decide it’s not possible.
In a scene with no obvious place for a hard transition, I use a soft GND. For example, in Yosemite Valley, where both El Capitan and Half Dome jut into the brightest part of the sky, a hard-transition filter darkens the primary subjects right along with the sky, while a soft-transition filter’s subtle transition blends much better.
A soft GND is also ideal for holding back the sky opposite the sun (e.g., the eastern horizon at sunset) enough to prevent sunset/sunrise color from washing out—a subtle difference that makes processing a snap.
An often overlooked giveaway of GND use is a reflection that’s brighter than the scene it reflects. Since this is impossible, it’s important to take care not to use too much density in reflection scenes.
A Singh-Ray 3-stop soft GND filter prevented the highlights from washing out in the sky without marring Half Dome with a visible transition. Photo by Gary Hart.
Metering
In the film days, exposure failure wasn’t an option. When a GND was called for, I carefully spot-metered first on the highlights and again on the shadows—the difference between the two gave me the scene’s dynamic range. With this information, I knew how much light to give my shadows and how many stops to subtract with a GND. (I still bracketed my exposure to hedge my bets.)
Then came digital photography, with its post-capture histogram—I soon found myself (after setting my ISO and ƒ-stop) spot-metering once on the shadows, dialing the shutter speed to a value that ensured sufficient foreground light and selecting the least extreme GND necessary to subdue the highlights. After my first shutter click, I’d check the histogram and adjust the shadows and/or GND, as needed.
Now we have mirrorless cameras and DSLR LCDs that display the histogram before capture. Now (after setting my ISO and ƒ-stop) I just start with the GND I think the scene calls for and, with my eye on my pre-capture histogram, dial up the shutter speed until the highlights are all the way to the right without clipping. Reviewing the post-capture histogram, I determine what adjustments are needed, if any. If my shadows are still too dark, I pull out a stronger GND, or add a second GND, and increase my exposure correspondingly.
Grad ND Technique
I handhold my GNDs, but some photographers prefer to use a holder. I find holders more trouble than they’re worth—they’re an extra step, and they interfere with lens hoods and polarizers (yes, it’s okay to use a polarizer with a GND). Holders also limit your flexibility, unless you want to carry a holder for every lens thread size and GND size combination you carry. On the other hand, if you ever want to use a GND when you’re not on a tripod, you’ll need a holder.
Placement of the transition separating the filter’s dark and clear regions will make or break a GND image. Your goal is to darken the brightest parts of the scene with minimal effect on the scene’s dark area, while disguising the transition as much as possible.
To position the GND, check out your composition in your viewfinder or on your LCD, and slide the filter down the scene until you’ve found its most effective position. If the GND transition is difficult to see, move the filter up and down and watch the scene slide between light and dark—just a few up/down strokes should be enough to locate the transition and position the filter.
When positioning a GND, I hold it slightly away from the lens to avoid scratching the filter. When I’m ready to click, I gently rest the filter against the lens to prevent reflections.
When a scene’s dynamic range exceeds the capability of your darkest GND, you can stack two GNDs (pancake one filter in front of the other) for extra density. For example, when shooting toward a bright sun, I sometimes combine 2 hard and 3 reverse GNDs for up to 5 stops of density spread fairly evenly across the top half of the frame.
Sometimes the intersection between the bright and dark regions in your scene isn’t horizontal. Fortunately, there’s no law that mandates a GND to be oriented horizontally. Always orient the transition along the boundary between highlights and shadows rather than defaulting to straight across the frame. In at least a quarter of my GND images, the GND was oriented at an angle.
One reason I prefer handholding my GND filters is so I can further disguise the GND transition by moving the filter up and down slightly during exposures of one second or longer. This is especially effective for hard-transition filters. You don’t need to move the filter much, and the amount of movement will vary with the size of the brightness you’re trying to hold back and the size of the area where you want to hide the transition.
An often overlooked GND benefit is moonrise and moonset photography. I’ve always felt it’s important to get both terrestrial and lunar detail in the frame; darkening the sky with a GND can stretch that twilight window by 10 to 15 minutes.
A Singh-Ray 3-stop hard GND filter allowed me to bring out detail in the twilight darkness of Garrapata Beach in Northern California without turning the moon into an overexposed disc. Photo by Gary Hart.
Grad NDs in the Digital Age
Digital processing provides the missing link for GND use. Even the best photographer, film or digital, will have visible GND transitions at capture. The late Galen Rowell, GND-filter pioneer and its greatest advocate, was a film shooter who was stuck with imperfect in-camera GND results—no matter how much he tried to disguise his GND’s use, there were situations where a visible transition or over-darkening was unavoidable at capture.
Rowell’s GND technique was impeccable, but he lacked the ability to touch up visible transitions, or too much/little density, after capture. Today, with careful dodging and burning in Photoshop, digital shooters can virtually eliminate any sign that a GND was used.
The dynamic range of the latest sensors allows me to keep my GNDs in my bag for shots I previously would have never attempted without a GND, but that doesn’t make my GNDs any less useful—combining today’s sensors with a GND enables me to capture scenes that were once impossible, bringing my camera closer than ever to the dynamic range my eyes see.
Gary Hart is a Northern California-based professional photographer and writer who conducts photo workshops in Death Valley, the Eastern Sierra, Grand Canyon, Hawaii and Yosemite. Gary’s book of images, Undiscovered Country, was sold at Barnes & Noble stores throughout America. Visit his website at garyhartphotography.com.