
Read Next
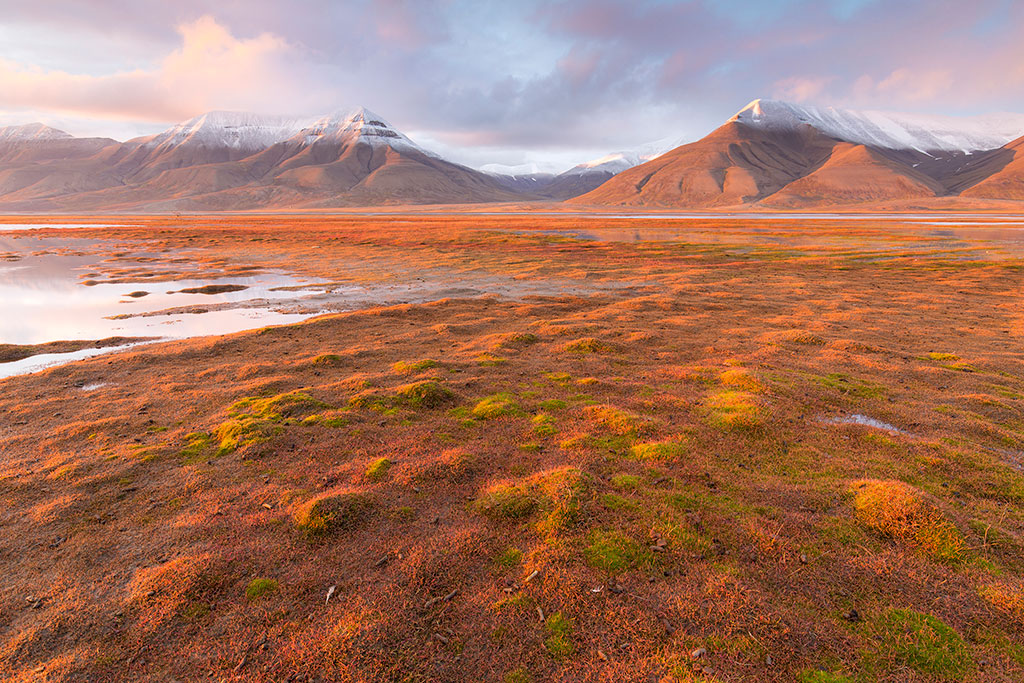
Why You Should Visit Svalbard In Norway For Photography
Svalbard in Norway features untouched...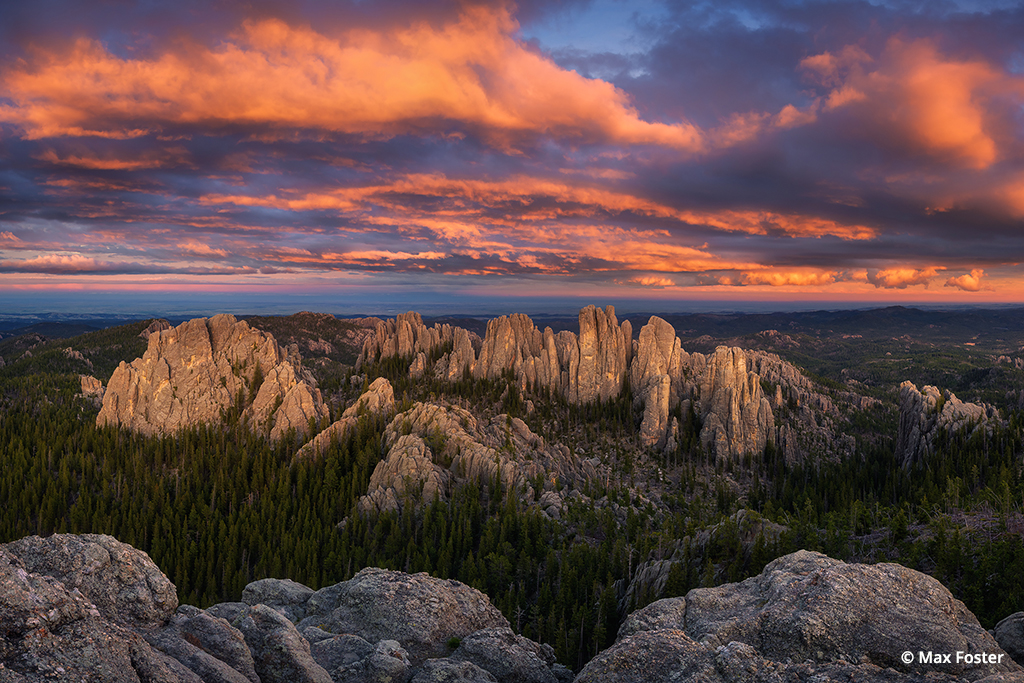
The Needles
The Black Hills of South Dakota cover...
Dinosaur Adventure!
After feeling trapped at home for the...
Get In Shape For A Workshop
Be In Good Physical Shape For The Environment
If you come from sea level and want to go on a tour at high elevation, are you physically fit and able to handle the abrupt acclimation? If the tour requires hiking or trail walking at high elevations, are you in shape to do this? Some tours offer locations that are strictly “work out of the car,” while others go to locations that require hiking. If you go to Arches National Park and expect to get a great shot of Delicate Arch, unless you’re prepared to walk 11⁄2 miles uphill across slickrock, it’s not going to happen. Ask first to see if the shots you want are within your capabilities.
—Russ Burden
Carry Small Snacks
Landscape photography in my workshops always involves shooting around the fringes of the day. Thus, it’s important to be flexible with meal schedules. Always have water and some energy bars or trail mix with you. There are times I’ll have the students pick up a deli sandwich and we eat on location. A good sit-down meal isn’t always practical. We usually consolidate our meals to a brunch and early dinner whenever possible. If the light is cooperating, we keep shooting.
—Don Smith
The Importance Of A Good Tripod
Many photography workshops will be out shooting in the early morning for sunrise and in the evening during sunset, and then some go right into night photography. We see so many new photographers show up with a nice DSLR and a cheap, plastic tripod. These tripods have limitations. They’re hard to position in the best angles to ensure proper stability. Often, the plastic baseplates slip, and shooting vertical shots becomes difficult during long exposures. Plastic tripods also break much easier during extensive use. Plastic tripods aren’t designed to be used in the outdoors. The one comment we hear at the end of many workshops by beginning photographers who have spent too much time struggling with their bargain tripod is, “I need to get a new tripod.” You don’t need to spend $1,000 on a tripod; there are many great options out there for a reasonable amount of money that will work great for your workshop.
—Stephen W. Oachs
Clean All Of Your Gear Ahead Of Time
Clean all of your lenses and camera bodies,
and your tripod and tripod head. Be sure to clean your camera’s sensor, if necessary. Check all of your gear in time to have it professionally serviced before the workshop. Bring plenty of spare batteries and memory cards, as well.
—Charles Needle
Pack Your Manuals
Bring a user’s manual for each piece of equipment you’ll be using. Even if you’re very familiar with your equipment, manuals can be invaluable when confronted with unforeseen technical issues. Most manuals can be downloaded from manufacturers’ websites as PDF files, which are easy to load onto your laptop or handheld device. Trip leaders can sometimes help troubleshoot technical problems with your equipment, but there’s no substitute for having your manual.
—Rick Vanselow
Review All Of The Materials From The Workshop
Make sure you read all the information provided by the workshop leader—at the very least when you receive it and one more time before leaving. Not only will you find things like start time and location, you may also find things like equipment requirements, what to wear, how much hiking to expect, whether a computer is needed and get tips for things often overlooked.
—Gary Hart
Know Your Camera!
Have a solid understanding of the basics of your camera: ISO, aperture, shutter and how they relate. I’ve had students come in to my workshops who just put the camera in an auto mode and think the camera is in control of everything. I work with people to show them that they’re indeed smarter than their cameras. Modern-day digital cameras are so loaded with various menu settings that it’s very confusing to most photographers. It’s information overload. I recommend either manual or aperture-priority mode if they do want to stay in an auto mode. With the plethora of camera models available, it’s impossible to know every setting for every one, but there are common settings that are important for every camera. For example, know how to access your three-channel histogram display. It’s difficult for me to help someone if they don’t have a manual with them on location for reference. Never leave home without your camera’s instruction manual and have a PDF backup on your smartphone for quick reference.
—Don Smith
Is It A Photo Tour Or A Workshop?
There is a difference. A photo tour is likely to take you to specific spots and then provide minimal instruction. If you’re comfortable with using your camera, and just want to see beautiful locations and have the freedom to go shoot what you want when there, a photo tour is great. Photo tours often provide critique only at the end of the tour. A workshop should have instructors who are there to help you when you ask, whenever you ask. An instructor should never put your needs aside for his or her own photos. You should have an instructor near you, ready to help whenever you need. A good student-to-instructor ratio for a workshop is 6 or 7 to 1; anything more and you’ll run the risk of struggling to get your questions heard.
—Stephen W. Oachs
Have A Good Attitude
Every workshop is different. Instructors can control only where they take you and when they take you there. Instructors can’t change the weather, make clouds roll in or pose the animals for you. Good workshops should try to make the best of every situation and every type of weather. If you go into a workshop expecting to get that epic sunset shot of Yosemite National Park, you may set yourself up for disappointment. Approach every workshop with an open mind to learn and the willingness to roll with the punches when the weather and wildlife don’t perform the way you hoped.
—Stephen W. Oachs
What’s The Right Lens To Bring?
Often, people ask what lenses they should bring. Almost all locations can make use of any lens you own, so my answer is bring them all or as many as you can carry comfortably. You can’t use a lens that’s at home. Try to experiment with different lenses than you would normally use in a given situation. Use the workshop experience to try techniques that get you away from your normal way of photographing. Don’t use new techniques instead of your old ways, but in addition to them. Come home with additional images that don’t necessarily look like your normal work and then decide if these techniques should be incorporated into your normal operations.
—Roger Devore
Be Ready To Be Up Early
Preparing for an early wakeup is a big help, particularly for people traveling from their home in the West to a location in the East. The best photography often requires being on location 45 minutes before sunrise. And make sure you have a clear expectation of the weather for the workshop location. It’s not sufficient to look at the weather averages for that date; it’s very important to check the weather forecast right before packing.
—Gary Hart
Have A Sense Of Humor
Perhaps most important, remember that having fun is why you signed up in the first place. Don’t take things too seriously.
—Cathy & Gordon Illg
russburdenphotography.com
(303) 791-9997> Charles Needle
charlesneedlephoto.com
(425) 968-2884> Rick Vanselow, Joseph Van Os Photo Safaris & TravelWild Expeditions
photosafaris.com, travelwild.com
(800) 368-0077
> Don Smith
don@donsmithphotography.com
donsmithphotography.com
ApertureAcademy.com
(408) 369-8585> Gary Hart
EloquentImages.com,
PhotographYosemite.com
(916) 283-6362> Cathy & Gordon Illg
advenphoto.com
(303) 237-7086
> Roger Devore
natureworkshops.com
(618) 589-1729