
Read Next
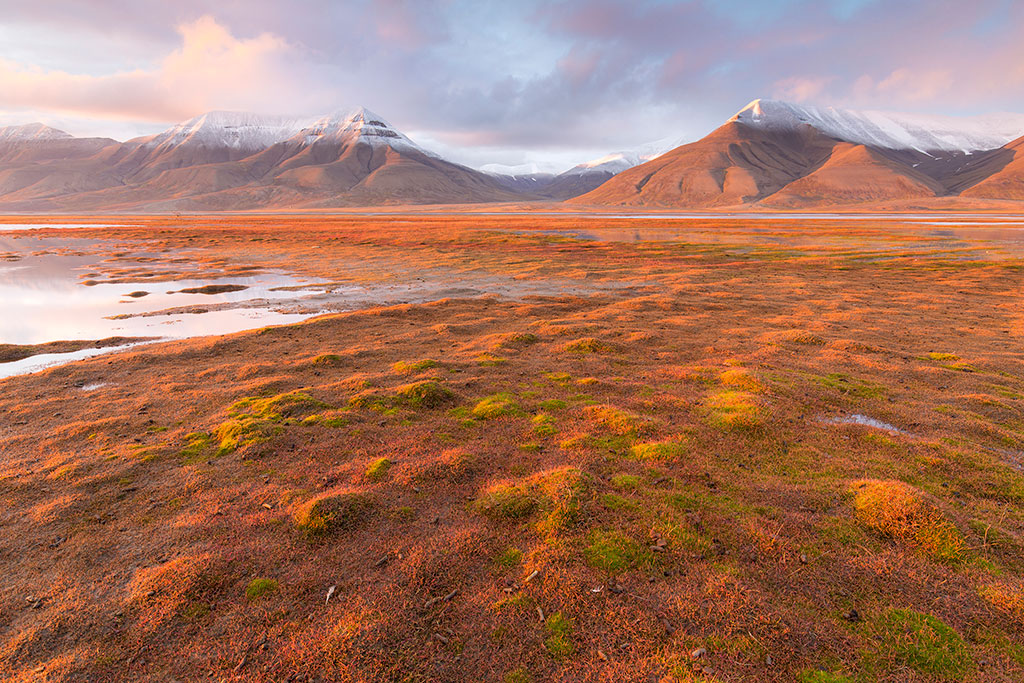
Why You Should Visit Svalbard In Norway For Photography
Svalbard in Norway features untouched...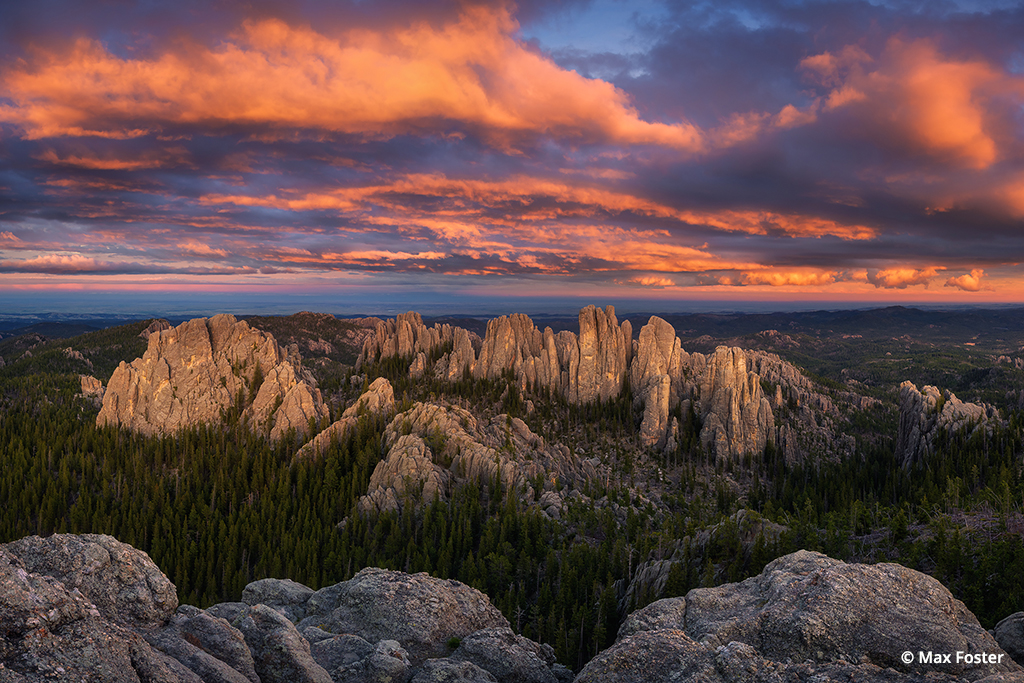
The Needles
The Black Hills of South Dakota cover...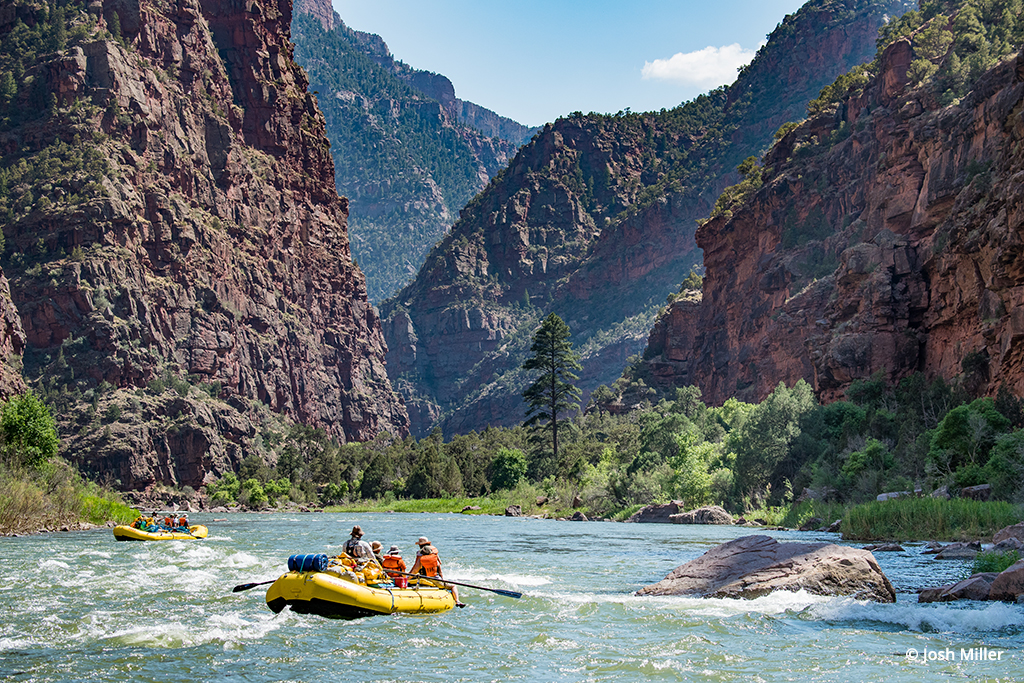
Dinosaur Adventure!
After feeling trapped at home for the...
The Art Of Astrophotography
Astrophotography is a word that we seldom hear or read; however, this photography technique was used soon after the first image was recorded. In fact, astronomer Sir John Herschel was the first to use the term “photography,” and the first to apply “negative” and “E2 positive” in relation to photography. In 1840, photochemist John William Draper was the first person to take a properly exposed astrophoto, an image of the moon. In the early 1920s, renowned astronomer Edwin Hubble used astrophotos he captured through a 100-inch telescope of what was then called the Andromeda Nebula to prove that Andromeda was a galaxy and that the Milky Way wasn’t the only galaxy in the universe.
One of the most powerful nature photographs ever made, a photo of the earth rise over the moon taken in December 1968 by Apollo 8 astronaut William Anders on the first manned mission to orbit the moon, inspired my father, photographer Galen Rowell. My dad called the famous image “the most influential environmental photograph ever taken.”
My father met Anders in the 1970s and had him sign a print of his earthrise photo for me when I was 10 years old. In his book Mountain Light, my father discusses several images he made over the years, including moonrises, moonlit scenes and star trails over mountain landscapes. From 1990 to 2001, I photographed many celestial subjects with my father, including the aurora borealis in the Arctic and the Milky Way in the White Mountains above his home in Bishop, Calif., where he established his gallery and offices, Mountain Light Photography.
In 2003, a year after my father and my stepmother Barbara died in a plane crash, I moved to Bishop. I’ve had the opportunity to attend a few of Mountain Light Photography’s workshops, led by talented photographers including Justin Black and Frans Lanting. My dad considered Bishop and the surrounding Eastern Sierra to be one of the most beautiful places in the world. The region also is home to one of the darkest night areas in the lower 48 states with relatively low light pollution that results in exceptional astronomical viewing.
Astronomical photography can be done with standard photo gear, up to a point. To take the images to the next level, there are a number of specialized products that many photographers use. One of the most useful is a tripod that’s designed for observing the heavens. Berlebach makes wooden tripods and accessories for terrestrial, as well as astronomical photography. The Planet Tripod is their most stable wooden tripod, featuring large wood cross sections and newly designed clamping elements. It delivers a high load capacity and excellent stability with minimum vibration transmission. Contact: HP Marketing Corp., www.hpmarketingcorp.com.
Following in the tradition of his father, Galen Rowell, Tony Rowell has spent the last two years tracking the stars and planets to create his own celestial images. Rowell adds another dimension to his cosmic photos by using light-painting techniques to create a fusion of earth and space.
Over the past two years, I’ve used motordriven telescope mounts and various cameras to track the stars and planets in long single-frame exposures. I usually photograph around the new moon when the sky is the darkest, weather permitting. I joke with my friends that I’m putting in 9-5 days but my hours are 9:00 p.m. to 5:00 a.m. I frequent several high-elevation locations within an hour’s drive of Bishop in the Sierra and the White Mountains.
To add another dimension to the images, I’m using light-painting techniques that I learned from my father. I use flashlights and off-camera flashes to illuminate the subjects that I combine with the night skies in what I call “astro-scapes.” Some nights, I go out alone when my subject is a short walk from my car, but when my subjects require a long hike, I hire friends to help carry the 80-plus pounds of gear.
There are many methods you can use to take astrophotos of the cosmos. The easiest is to take wide-field exposures from a fixed tripod, which usually results in the stars trailing unless you keep your shutter open for 30 seconds or less with a 50mm lens or wider. Another technique is called piggyback photography, where you need to have a camera equipped with a Bulb setting and cable release to lock the shutter open. With our planet rotating 15º every hour, your camera has to be mounted on an equatorial telescope in order to track the planets and stars. The learning curve can be frustrating, and it requires many late nights to perfect the polar alignment (keeping the scope centered on the north celestial pole, which is near the north star, Polaris), but once you make it through what I call astro-boot camp, the images you’ll capture will be very rewarding.
One of the most popular techniques is prime-focus photography, which involves using a T-ring (an adapter that connects your camera to a telescope) so that you can take deep-sky photos of galaxies, nebulas and planets using your telescope as a telephoto lens. Photographers using film will have to bracket, while those using digital cameras have the advantage because they can figure out the correct exposure right away. Digital cameras are much easier to use because you can see relatively quickly whether you actually got the image you set out to create. Also, using film often requires a complex series of steps to make the film hypersensitive so the faint starlight will make an exposure. Digital cameras, which can operate at extremely high ISOs, give you a distinct edge. Many a film shooter has left a night of astrophotography only to find that none of the images came out, while digital photographers are able to evaluate and adjust and reshoot during the night. A few potential problems with prime-focus photography are vignetting in the corners of images and getting the focus just right.
For more advanced astrophotography, there are CCD (charge-coupled device) astronomical cameras that are specially designed for astro-shooting. These dedicated units have advantages over film and digital SLRs such as better light-gathering capabilities and increased sensitivity. However, astrophotography CCDs are expensive, and most of them have a very small field of view compared to film and many D-SLRs.
Rowell finds solace in tracking and shooting the heavens, and his images are a combination of diligence, trial and error, and different techniques. These range from telescope adapters to long exposures with D-SLRs, giving him the power of instant feedback, benefitting the modern landscape photographer in the technically challenging realm of astrophotography.
This makes the film and D-SLR option better suited for wide-field images, whereas astrophotography CCDs perform better for single objects like planets with a narrower field of sky. I haven’t used an astrophotography CCD, but I’m definitely interested in this rapidly growing technology.
As you progress, be prepared to spend a considerable amount of money on your new tools. I’ve sold and traded several telescopes to upgrade my gear. I’m grateful to Sam Sweiss, the manager of Scope City in San Francisco, for sponsoring me with equipment over the years; his input and help have been enormously valuable. Besides my friends and family supporting me, another person who has helped me with my astrophotography has been architect/astronomer David Ta-Wei Lin.
While writing this article, I drove through Yosemite on my way home to Bishop and was fortunate to meet David Rodrigues, an astronomer known as the Astro-Wizard. In 1970, David and his team at the Chabot Observatory in Oakland, Calif., used a large telescope to help NASA navigate and bring Apollo 13 back safely to Earth after the moon-bound mission encountered technical difficulties. When I told him I was planning on doing some astrophotography that week, he invited me to join him and a few other scientists at the Barcroft High Altitude Research Station located in the White Mountains at 12,450 feet. Halfway through my drive the next evening, I drove past the bristlecone pine grove where a few months earlier I had captured one of my best images of the Milky Way combined with a tree that’s said to be over 4,000 years old.
After arriving at Barcroft, I met the group and then began aligning my scope with the north celestial pole. This was the best and darkest location I’ve photographed from, although I was surprised when the temperature dropped down to a chilling 25º. That night, I captured the Milky Way and Andromeda galaxies on film using my father’s Nikon F100 with a 300mm ƒ/2.8 lens. The next day, a marine biologist/astronomer named Chris showed me his images taken with the new Nikon D700, and I was impressed with the image quality and the low amount of digital noise at higher ISOs. He was very pleased with the D700 and inspired me to buy one.
As I continue learning the art of astrophotography, I look forward to photographing many celestial events in the years to come, including new comets, eclipses and meteor showers!
Tony Rowell, son of renowned photographer Galen Rowell, is a photographer in his own right and has had his images published in books, calendars and magazines, including a few previous issues of OP. More of Tony’s images can be viewed on his website at www.tonyrowell.com.
Cameras
Hasselblad CM 500 with a Carl Zeiss 50mm ƒ/4 lens
Nikon F4
Nikon F100
Nikon D100
Deep-Sky Lenses
Nikkor 300mm ƒ/2.8
Nikkor 400mm ƒ/5.6
Nikkor 500mm ƒ/4
Wide-Field Lenses
Nikkor 50mm ƒ/1.4 at ƒ/2.8 for meteors and ƒ/4 for fine-art prints to avoid spherical aberration
Nikkor 28mm ƒ/2.8
Film
I highly recommend Fujichrome Provia 400X because of its saturation and its low reciprocity failure (when the photographic emulsion gets less sensitive as the exposure time is increased).
Photo Labs
Cantoo, Color Folio, NEWLAB and Pictopia have all done beautiful digital scans for me.