
Read Next
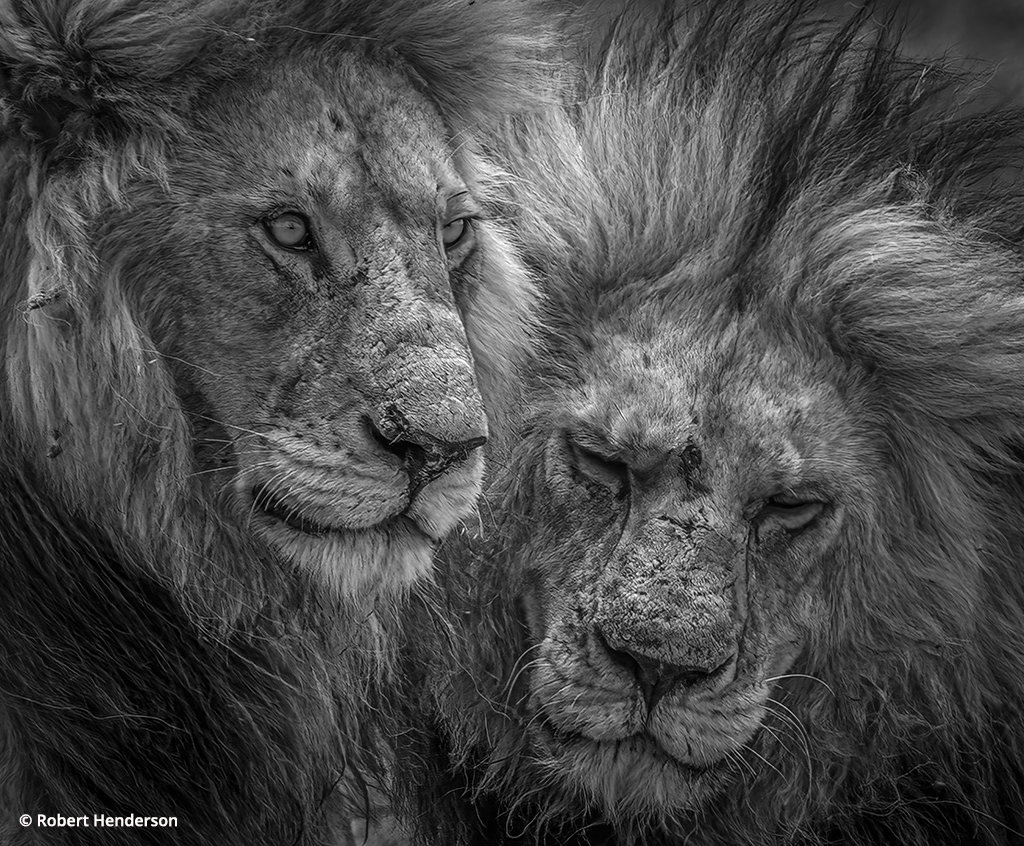
Photo Of The Day By Robert Henderson
Today’s Photo of the Day is...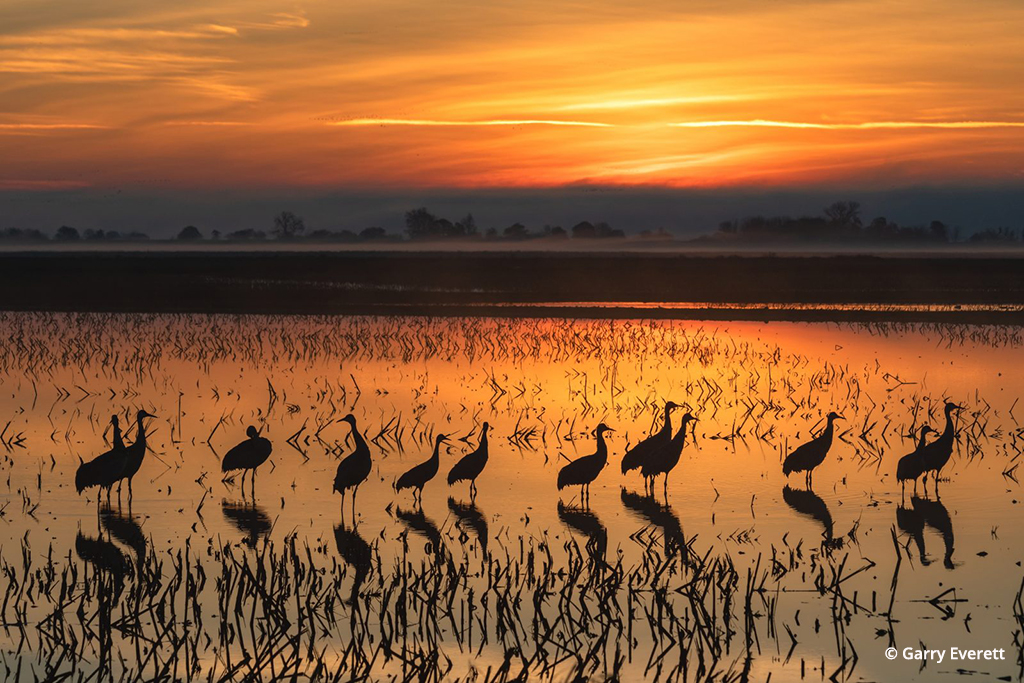
Photo Of The Day By Garry Everett
Today’s Photo of the Day is...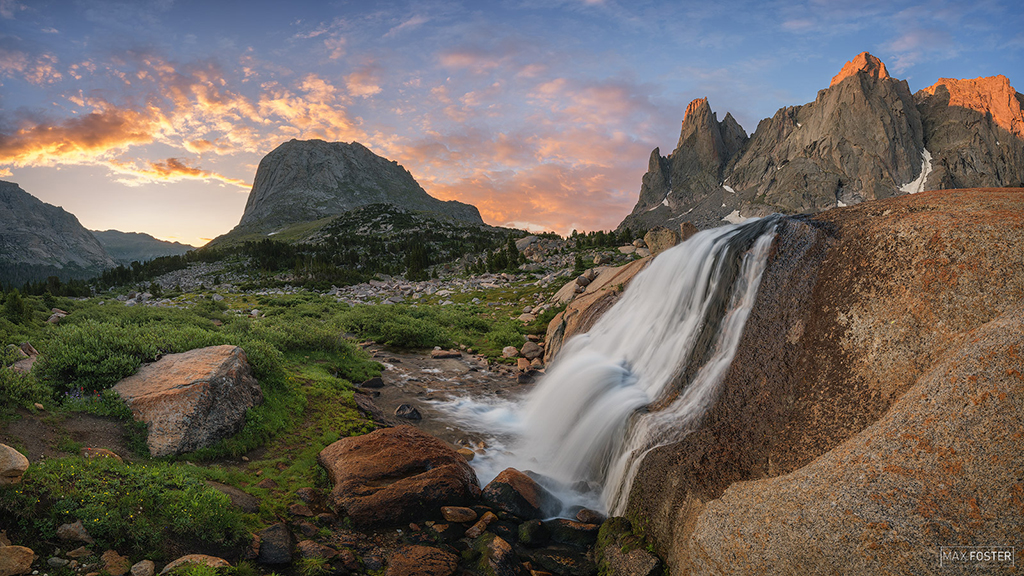
Photo Of The Day By Max Foster
Today’s Photo of the Day is “The...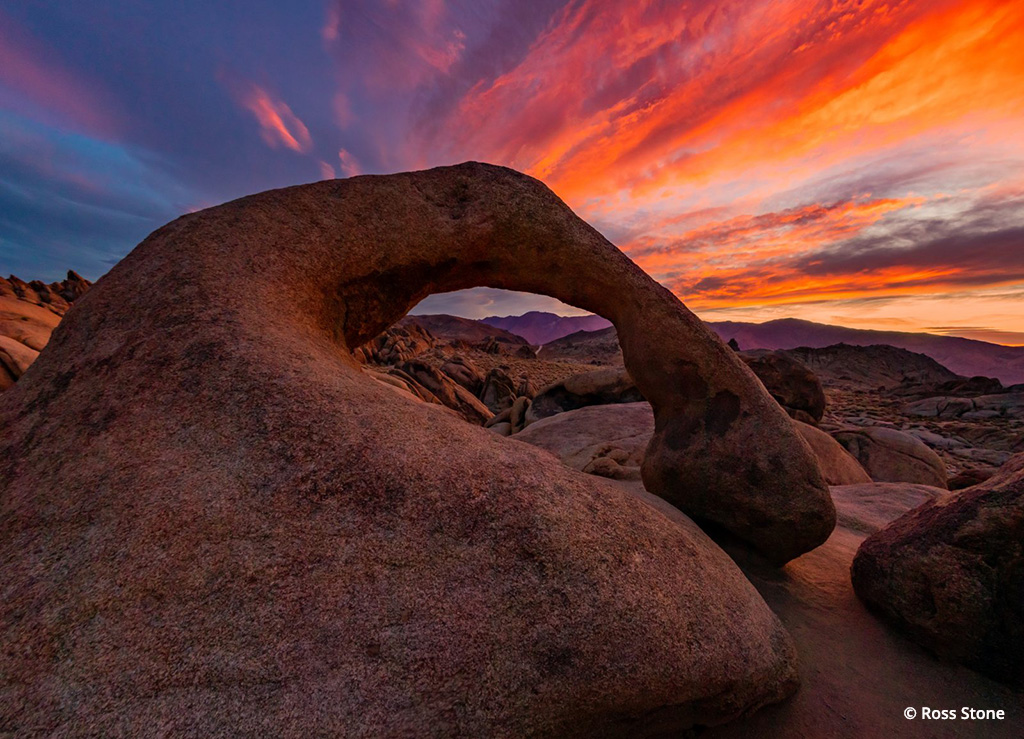
Color Secrets
With the transition to digital, I’ve found a lot of photographers who want lively, bright colors with their nature images, but aren’t getting them. I’ve seen pros struggle with this, too. Students in my workshops often have the same challenges.
Many photographers then resort to two controls in Photoshop: Brightness/Contrast for the contrast and Hue/Saturation for the color. Both can lead to poor results that give digital a bad name.
I have three simple secrets to better color. To get the best results, you need to follow them in the order given and always use the first two. The third is optional and depends on the photo.
1 Set blacks and whites appropriate to the image.
2 Adjust midtones for overall brightness in the image.
3 Use Hue/Saturation for color, but only color by color.
To download a high resolution version of this photo, click here!
You can accomplish these steps quickly, and the first two can be done with either RAW- or JPEG-shot images. The techniques work in all image-adjustment programs that let you see where the blacks and whites are in your photograph. Note that the only adjustment here that’s designed specifically to change color is Hue/Saturation, and I suggest that its use might be optional, at times.
We’ll look at these adjustment secrets one at a time. Ideally, you should use them as adjustment layers so no pixels are actually changed. Adjustment layers let you readjust any layer as needed with no effect on image quality. But you can do these adjustments directly to the photo if you aren’t using layers yet.
Blacks And Whites. Most photos need a pure black and a distinct white for the viewer’s eye to fully appreciate the tonal qualities of a photo. Such black and white points or areas also have a strong effect on color. Because you’re often dealing with multiple areas in a photo that are black or white, these are usually referred to as the plural, blacks and whites.
You can adjust blacks and whites simply in Photoshop and Photoshop Elements. Open Levels (Image > Adjustments> Levels); then, while pressing the Alt/Option key, click on the black slider under the histogram and move it to the right. As long as the Alt/Option key is pressed, the Levels screen will turn white when you start to move the black slider.
This is the blacks threshold screen. Whatever shows up as black is where pure black will show up in your image. The colors show where a color channel is maxing out on the dark side. You can move the slider until the blacks just start to show as little specs or you can go farther and make shadows deeper. A foggy day usually won’t have a solid black—don’t expect that.
Next, press the Alt/Option key, click on the white slider and move the slider to the left. The screen now turns black, showing you the white threshold screen. You’ll see little bits of white and color as you move the slider. The white is where areas are pure white; colors show where a channel has maximum brightness for a color. With whites, you usually don’t want to go very far with their adjustment or you’ll lose color in the bright areas. I typically move the slider left until whites just start to show and stop.
This doesn’t apply to bright, specular highlights (such as those found on water, for example), where the sun glints off of an object. This will always be pure white and probably should be, unless it’s over too large an area. Avoid taking pictures that give you the latter.
These same adjustments are possible in Camera Raw. Shadows works like the black slider with Levels, while Exposure acts like the white slider. You also hold down the Alt/Option key while adjusting.
With blacks and whites set, you can now better evaluate color. Remember,too, that black and white points are subjective and you can make the areas of blacks and whites larger or smaller in your photos for a specific interpretation of the image. Also, as you use this control, colors are affected beyond just their relationship to black and white. In most nature photography, this is a benefit and not something to worry about.
Adjust Midtones. Now you want to make the overall photo look bright or dark enough, whatever is appropriate to your subject, by adjusting the midtones. You shouldn’t touch the blacks and whites; that’s why I suggest doing a midtone adjustment as a totally separate adjustment (for example, if you’re using the midtone slider of Levels) or adjustment layer.
The best way to adjust your midtones is to use Curves in Photoshop or Curve in Camera Raw. If you’re using Photoshop Elements, you don’t have curves, though; you’d use the middle gray slider in Levels. If you’re using Camera Raw, you can use Brightness. These tools don’t provide as much control, however.
To get a nice adjustment of your midtones, you don’t have to do anything fancy with Curves (Curve > Tone Curve in Camera Raw). Click on the middle of the curve and drag it up to lighten tones or down to darken. This applies the change most strongly to the point where you’ve clicked, then blends that change uniformly toward black (bottom) and white (top) without changing either.
If you lighten the photo and your shadow areas become too bright, click lower on the curve and drag that point back toward the original center line. If the adjustment makes your highlights too bright, click high on the curve and bend it back toward the center. The reverse is true if you move the curve to darken an image.
Camera Raw has pre-made curves that are accessible by clicking the arrow to the right of Tone Curve. You can click on any and use as is, or just start from Linear and follow what I described above.
Hue/Saturation And Color. At this point, you’ll probably find your colors have a bit of snap and life to them. The problem with nature photography is that often colors aren’t recorded the same way they appear in nature (this has always been a challenge with nature photography, from film to digital). Therefore, it helps to decide which colors are key to your image and work their saturation individually.
You do this with Hue/Saturation, and for the best control, use this as an adjustment layer. Go up to Edit > Master and click on the arrow for the drop-down menu. This gives you a set of colors based on the primary and secondary colors of light. Choose one that’s closest to the colors you want to adjust. This limits Photoshop to adjusting these colors and not others. Take your cursor and move it over the photo. Click on the color you’re working with, which refines the range of color that can be adjusted. One note for nature photographers: you’ll often adjust green because it’s a common color that’s often recorded too yellow or too blue. If you now click on a green in the photo, Photoshop will sometimes change the name to Yellow 2. Ignore that. You’re adjusting correctly.
You can also use the + and-eyedroppers in the Hue/Saturation dialog box to further refine the color range by clicking other spots of color in the photo. If you really want to restrict colors, try moving the markers in the color spectrum
bands at the bottom of the box, too.
That’s it! Three secrets that are easily applied to give you better color in your nature photographs. As always, the great thing about Photoshop is that you can experiment and apply these ideas as much as you want. You can undo anything, and if you use adjustment layers, you make only “non-destructive” adjustments—you can adjust and readjust as much as you want without harming image quality. If you aren’t sure about any of the adjustments I’ve described, just try it. You really can’t damage your image as long as you don’t save over your original file (and you’re working on a copy of that file, of course!).
OP Rob Sheppard’s latest book, Outdoor Photographer Landscape and Nature Photography with Photoshop CS2, is available in bookstores. His new Photoshop how-to program, Landscape Photography and Photoshop CS2, is available from his website at www.robsheppardphoto.com.