
Read Next
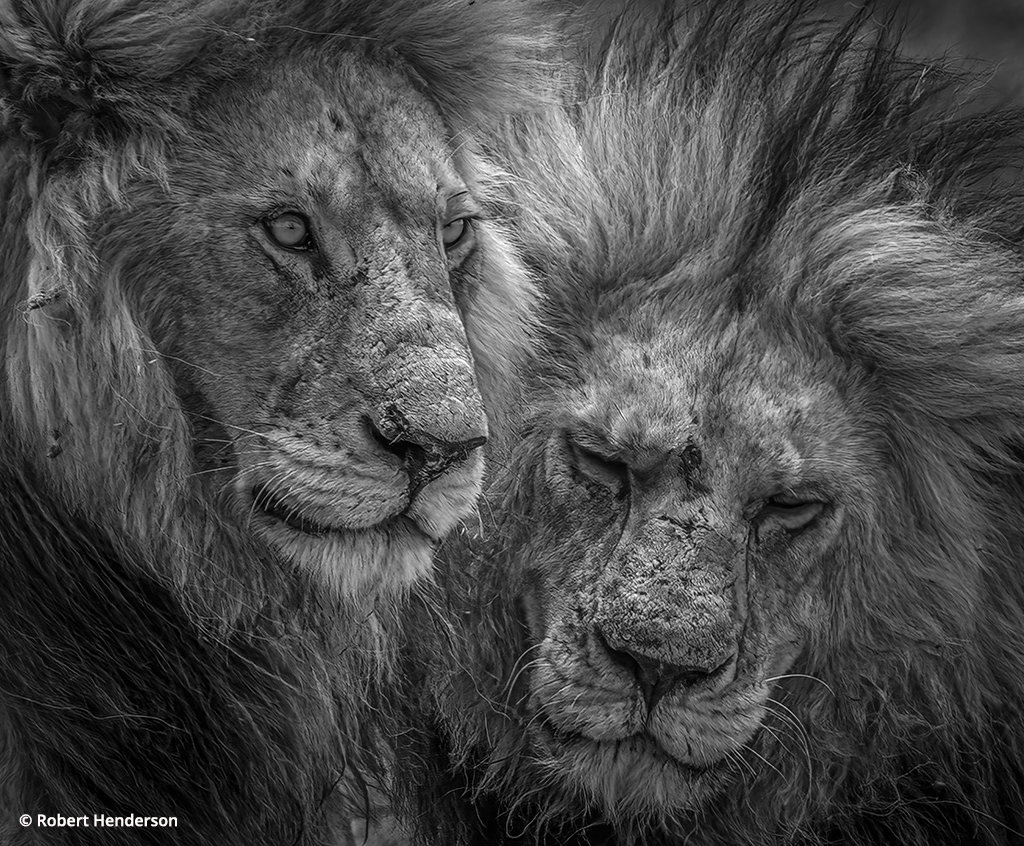
Photo Of The Day By Robert Henderson
Today’s Photo of the Day is...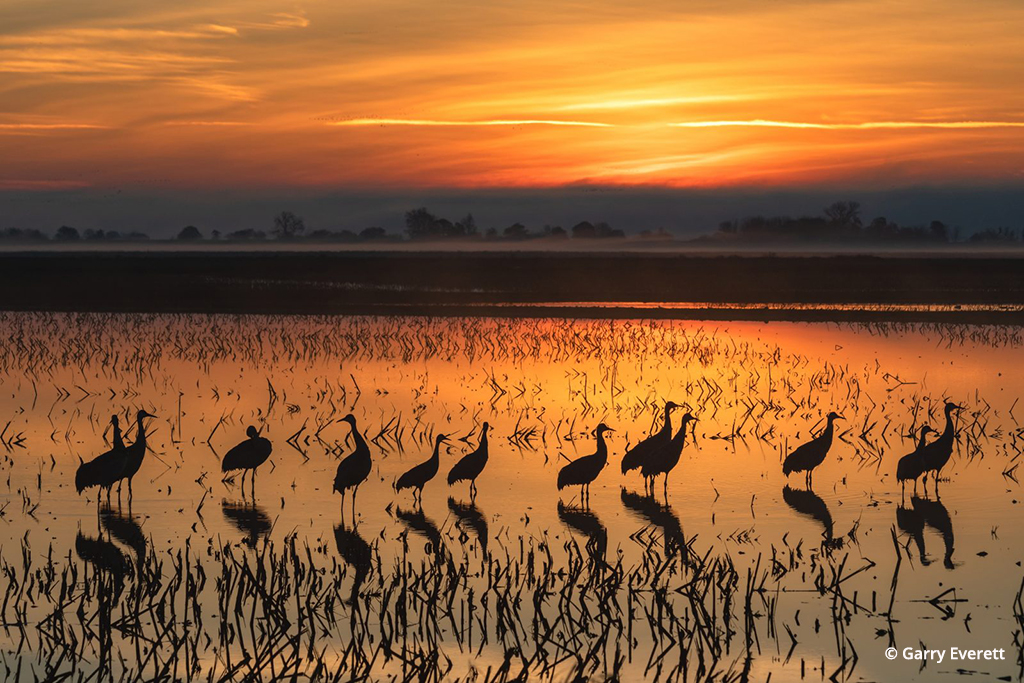
Photo Of The Day By Garry Everett
Today’s Photo of the Day is...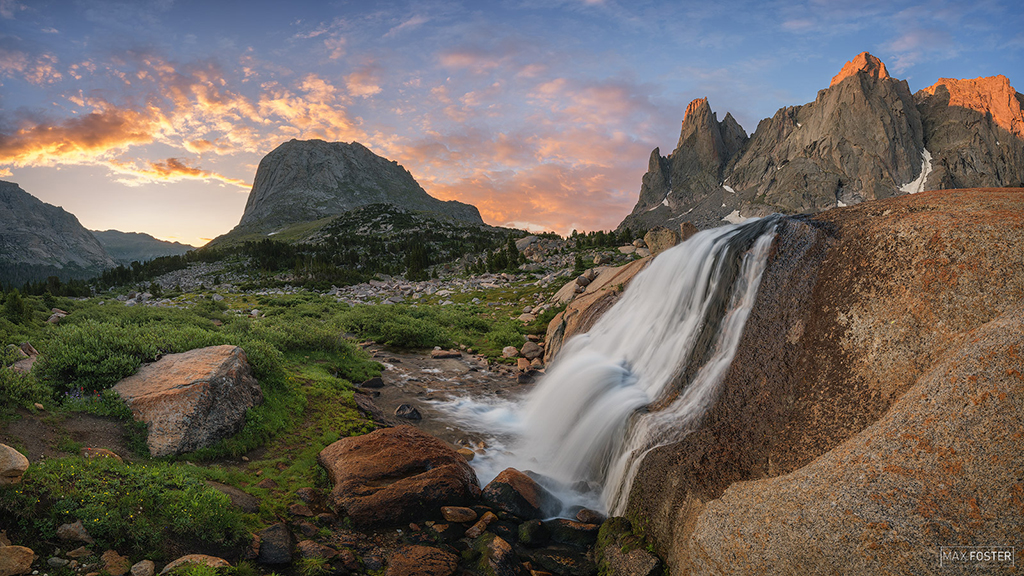
Photo Of The Day By Max Foster
Today’s Photo of the Day is “The...
How To Set The Black Point
Ansel Adams wrote extensively about the importance of blacks in a print in his classic book, The Print. While there’s only one true black tone in a print, there are usually many spots of black throughout the image, and this is where the term “blacks” comes from. Without blacks in a print, it will never have the life and depth it needs, and with color images, the color either. Both Kodachrome and Fujichrome Velvia have strong blacks in the processed images, and this strongly influences their colors.
Setting blacks is partly subjective, partly an art, partly a science. There are no rules that will work for every photo. In fact, some scenes, such as a foggy landscape, won’t have blacks at all. However, you generally need to do something with the blacks so your image will look its best.
Blacks should be set right away in your image-processing workflow. How you do this influences the ultimate contrast and color of your photograph. I find it helps if you actually can see those blacks with a black threshold screen. Sometimes this is all you need to do to make a photograph go from dull to just right. Never adjust color parameters such as saturation before setting blacks.
Set blacks in Photoshop by using Levels. Hold down the Alt or Option key as you click and drag the black slider to the right. The screen will turn white; this is the blacks threshold screen. As you move the slider, details will start to appear. Pure blacks will be pure black in your photo. Usually, you’ll need at least something pure black, though if your image is mostly one color, you won’t get a pure black, so adjust until some colors appear.
You may have heard of using the black eyedropper in Levels to set blacks. I can’t recommend this method, as it will also cause a color change to the image, which can destroy subtle, natural colorcasts.
Set blacks in Lightroom by using the Blacks slider in the Develop module; set blacks in Camera Raw with the Blacks slider in the first tab at the right side of the interface; set blacks in Aperture by using the Black Point slider in Exposure. These sliders work just like the black slider in Levels. Hold down the Alt or Option key (Command key for Aperture) as you move the slider to the right. The same threshold screen will appear, and you can decide how strongly the blacks will appear in the photo. Aperture also does this with the black slider in Levels.
When you make the adjustment, you may find that the picture gets dark overall. Make the picture brighter by checking your whites (the white slider in Levels or Exposure in Lightroom, Camera Raw and Aperture) and by adjusting midtones (with Curves or the middle slider of Levels in Photoshop products or with Brightness or the Tone Curve in Lightroom, Camera Raw and Aperture).
Different photos will require different amounts of black. Experiment and see what works best for you and your subject matter. Once you start doing this, you may be surprised by how much livelier your prints will look.
You can see more of Rob Sheppard’s techniques and find his free videos on setting blacks under Lessons at www.robsheppardphoto.